
- US 714.375.2800
- UK +44 (0)7947185134
Life's Ambition - Honda CR 250 RC Designed by Roger DeCoster
Even from an early age all I wanted to do was race motocross, going to races with my Dad, watching the riders. Seeing the bikes in the pits and the action on the track really did it for me. Motocross was all I ever wanted to do.
After many years of pestering my Dad he finally relented to the pressure. Then on my 13th birthday he bought me a Suzuki TS 100 C to learn to ride on. Following that he bought an old TS 125 and turned it into a RM look alike and I started to go to our local practice track. I went out on it a few times against some real MX machinery. Very quickly it became obvious that the old Suzuki TS was not the bike to have. I needed a proper MX bike to ride.
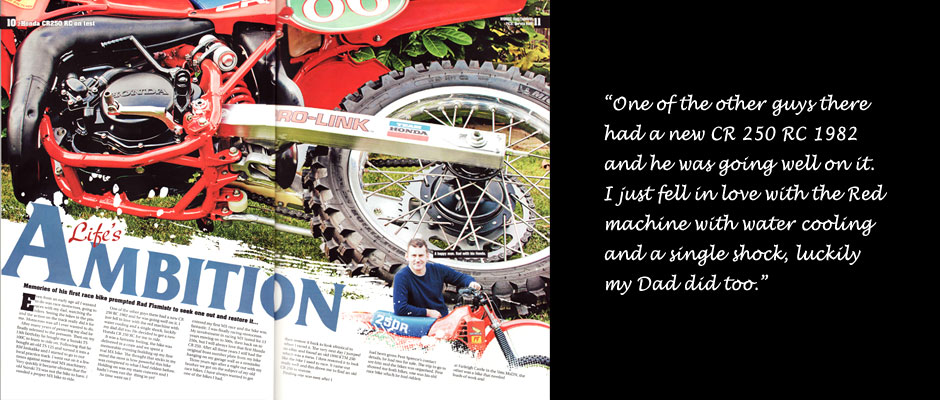
One of the other guys there had a new CR 250 RC 1982 and he was going well on it. I just fell in love with the Red machine with water cooling and a single shock, luckily my Dad did too. He decided to get a new Honda CR 250 RC for me to ride.
It was a fantastic feeling, the bike was delivered in a crate and we spent a memorable evening building up my first real MX bike.
The thought that sticks in my mind the most is how powerful this bike was compared to what I had ridden before. Holding on was my main concern and I hadn’t even run the thing in yet !!!
As time went on I entered my first MX race and the bike was fantastic. I was finally racing motocross. My involvement in racing MX lasted for 13 years moving on to 500’s, then back onto 250’s, but I will always love that first Honda CR 250. After all these years I still had the original front number plate from my bike hanging on my garage wall as a reminder.
Three years ago after a night out with my Brother we got on the subject of my old race bikes, I have always wanted to get one of the bikes I had, then restore it back to look identical to when I raced it.
The very next day I jumped on Ebay and found an old 1990 KTM 250 which was a mess. I then restored it to look like the bike I used to race. It came out really well and this drove me to find an old CR 250 to restore.
Finding one was easy after I had been given Pete Spence’s contact details, he had 2 for sale. The trip to go to see him and the bikes was organised. Pete showed me both bikes, one was his old race bike which he had ridden at Farleigh Castle in the Vets MxDN, the other was a bike that needed loads of work and was missing some genuine parts.
Thankfully, Pete sold me his race bike. The bike was 99% original, but needed taking apart and rebuilding. Pete also let me ride the bike before I took it home.
The Honda started easily and rode well. A nice big wheelie at the start of my ride sold the bike to me, I had to have it.
My journey home in the hire van had me smiling all the way. I finally have a Honda CR 250 RC again.
First thing to do when I got home was to spend some time cleaning the bike as it was still covered in Farleigh Castle mud from its last race.
Then the restoration journey started the very next day with stripping down the bike. Bagging and tagging all the parts, screws and fixings. Then all the main parts were boxed ready for their restoration. Then unfortunately I found the frame had a big hole just by the gear side foot peg that would need sorting out. The rear section of the frame was twisted and needed straightening, this was done on by clamping the frame on a machine bed straightening the rear section with tubes and a bit of force until it measured up level and true.
Luckily Pete had fitted a 1981 CR 250 RB aluminium water pump and clutch casing to the Honda, so no rot dramas as you would possibly get with a magnesium casing. The engine was sent away to my friend Dave at D-tech Motorcycles where the front forks, rear shock were stripped and rebuilt, wheels had stainless steel spokes built up on repainted hubs then the damaged frame was welded. Dave stripped the engine down removing all of the internals so I was left with the empty castings, barrel and head. These were all vapour blasted, masked and painted semi gloss black. All of this was returned to D-tech where every bearing, seal and gasket was replaced including new piston and rings.
All of the screws with other parts were sent away for zinc plating, taking note which screws were clear, coloured and black, also where they went. The engine was built up using these screws. It looked fantastic when fully built. The plastic magneto cover was badly marked and needed replacing. After a few emails and calls I found a new one in Belgium, so that was an important replacement for the completed engine.
The frame, shock spring and lower fork legs were sent away for blasting then painting to match the red of the plastics. The original exhaust with silencer were blasted then painted in a heat resistant satin black.
The aluminium swing arm was really badly marked, it looks like some track tape had wrapped itself around the rear wheel had worn some very deep marks into the top as well as the bottom face of the swing arm.
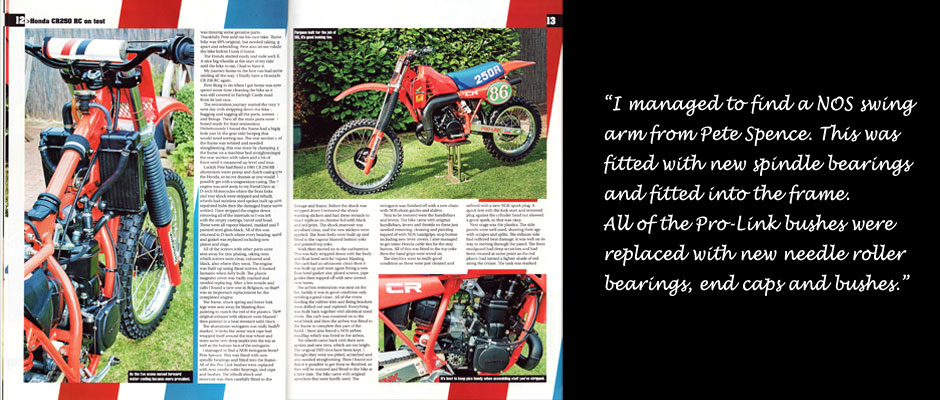
I managed to find a NOS swing arm from Pete Spence. This was fitted with new spindle bearings and fitted into the frame. All of the Pro-Link bushes were replaced with new needle roller bearings, end caps and bushes.
The rebuilt shock and reservoir was then carefully fitted to the linkage and frame. Before the shock was stripped down I removed the shock warning stickers and had these remade to exact replicas on chrome foil with black and red print. The shock reservoir was anodised clear, then the new stickers were applied. The front forks were built up and fitted to the vapour blasted bottom yoke and painted top yoke.
Work then moved onto the carburettor. This was fully stripped down with the body and float bowl sent for vapour blasting. The carb had an ultrasonic clean then it was built up and re set again fitting a new float bowl gasket zinc plated screws, pipe guides then topped off with new correct vent hoses.
The airbox restoration was next on the list, luckily it was in good condition only needing a good clean. All of the rivets holding the rubber trim and fixing brackets were drilled out and re- plated. Everything was built back together with identical sized rivets. The carb was mounted onto the reed block and then the airbox was fitted to the frame to complete this part of the build. I have also found a NOS airbox mudflap which was fitted to the airbox.
The wheels came back with their new spokes and new rims, which are too bright. The original DID rims have been kept. I thought they were too pitted, scratched and also needed straightening. Then I found out that it is possible to get these re-finished , so they will be restored and fitted to the bike at a later date. The bike came with original sprockets that were hardly used. Then the swing arm was finished off with a new chain with NOS chain guides and sliders.
Next to be restored were the handlebars and levers. The bike came with original handlebars, levers and throttle so these just needed removing, cleaning and painting topped of with NOS handgrips, stop button including new lever covers. I also managed to get some Honda cable ties for the stop button. All of this was fitted to the top yoke then the hand grips were wired on.
The electrics were in really good condition so these were just cleaned and re fitted with a new NGK spark plug. A quick test with the kick start and removed plug against the cylinder head nut showed a good spark , so that was OK.
Next stage was the plastics. The side panels were well used showing their age with scrapes and splits. The exhaust side had suffered heat damage, it was well on its way to melting through the panel. The front mudguard had deep scratches and had been creased at some point as the red plastic had turned a lighter shade of red along the crease. The tank was marked quite badly with 3 deep gouges in the plastic. Both radiator shrouds looked very new with a few small scuffs, but looked OK to use as was the rear mudguard.
I managed to find some Original Honda NOS side panels and front mudguard at an extremely high price. New plastics are really hard to find these days, but the old panels would not have looked any good fitted as they were. The new Honda plastics were fitted to the bike, it looked fantastic apart from that tank. The search was on for a NOS or nearly new one, not an easy task at all. I did find out that there was one available, but I waited and waited and it never appeared. The asking price for this NOS tank was a heavy £550.00. Due to the frustration of waiting so long I tried to polish the one I had, but after days of rubbing down and polishing I could not make the tank look any better. Then I found Plastic Renovations in the USA, run by Phil Cox.
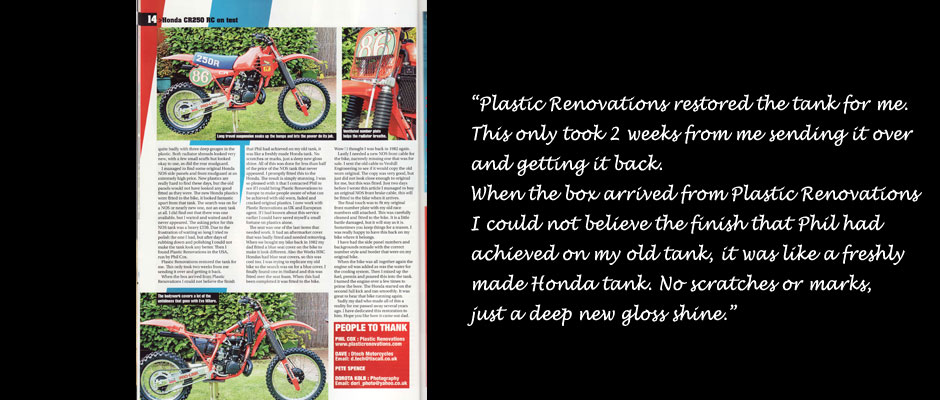
Plastic Renovations restored the tank for me. This only took 2 weeks from me sending it over and getting it back.
When the box arrived from Plastic Renovations I could not believe the finish that Phil had achieved on my old tank, it was like a freshly made Honda tank. No scratches or marks, just a deep new gloss shine. All of this was done for less than half of the price of the NOS tank that never appeared. I promptly fitted this to the Honda. The result is simply stunning.
I was so pleased with this that I contacted Phil to see if I could bring Plastic Renovations to Europe to make people aware of what can be achieved with old worn, faded and cracked original plastics. I am now working with Plastic Renovations as their UK and European Agent. If I had known about this service earlier I could have saved myself a small fortune on plastics alone.
The seat was one of the last items that needed work. The seat had an aftermarket cover that was badly fitted that needed removing. When we bought my bike back in 1982 my Dad fitted a Blue seat cover on the bike to make it look different. Also the Works HRC Honda’s had blue seat covers, so this was cool too. I was trying to replicate my old bike so the search was on for a blue cover. I finally found a cover in Holland and this was fitted over the seat foam. When this had been completed it was fitted to the bike. Wow ! I thought I was back in 1982 again.
Lastly, I needed a new NOS front cable for the bike narrowly missing one that was for sale. I sent the old cable to Venhill Engineering to see if they would copy the old worn original. The copy was very good, but just did not look close enough to original for me, but this was fitted. Just 2 days before I wrote this article I managed to buy an original NOS front brake cable, this will be fitted to the bike when it arrives.
The final touch was to fit my original front number plate with my old race numbers still attached. This was carefully cleaned and fitted to the bike. It is a little battle damaged, but it will stay as it is. Sometimes you keep things for a reason. I was really happy to have this back on my bike where it belongs.
I have had the side panel numbers and backgrounds re-made with the correct number style and border that were on my original bike.
When the bike was all together again the engine oil was added as was the water for the cooling system. Then I mixed up the fuel, premix and poured this into the tank. I turned the engine over a few times to prime the bore. The Honda started on the second full kick and ran smoothly. It was great to hear that bike running again.
Sadly my Dad who made all of this a reality for me passed away several years ago. I have dedicated this restoration to him. Hope you like how it came out Dad.